

I developed a distributed application to calculate the Z-transform on Starknet. Starknet is a network that revolutionizes the way we use blockchains because it allows us to increase the distribution of computing power as well as confidentiality on the blockchain, thanks to zero-knowledge proofs.

In short, the proofs generated by Cairo can be verified on the Starknet network, and it is also possible to transmit tokens safely thanks to the bridging between layer 2(Starknet) and layer 1 (Ethereum).
Why the Z-Transformed?
The Z-transform is a powerful mathematical tool in signal processing. It is the discrete equivalent of the Laplace transform, which transforms a real signal from the time domain into a signal represented by a complex series called the Z-transform (https://lpsa.swarthmore.edu/ZXform/FwdZXform/FwdZXform.html).
We will implement a simple one-sided transformation that can be seen in the following formula:
Implementation with Cairo
Cairo is the programming language for writing smart contracts that run on Starknet. It is a language that is currently evolving and even maturing: it has moved from a format similar to Python and Assembler to a more modern language like RUST. You can read Cairo’s documentation by calling Hello, Cairo to learn more.
Apart from Cairo, I use the Protostar tool that allows me to test, compile and test smart contracts during their creation. To configure Protostar, I invite you to read this on Swmansion.
Algorithm
For implementation, I used a special case of Bluestein’s algorithm which is normally used with complex numbers but on which I make a simulation with felts which are the data type for integers in Cairo.
X(z) = Sum over i=0 to n-1 of x[i]*z^(-i)
Mathematically, this can be visualized by

Z-transform applications in cryptography
Currently, STARK technology is one of the great advances in cryptography and Zero Knowledge Proof on the Internet. The use of Fiat-Shamir and FRI algorithms to create the STARK Polynomial IOP generates computational confidence that can be accepted by all STARKNET network members.
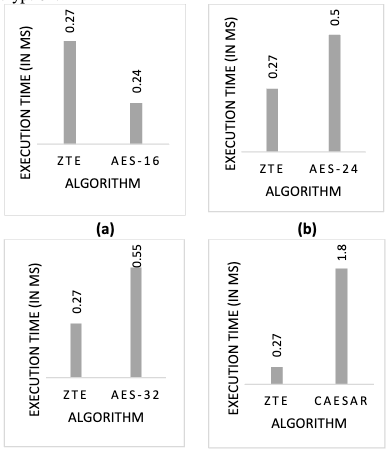
Nevertheless, the article “A Study of Z-transform based encryption algorithm” by Mohammed N. Alenezi and Fawaz S. Al-Anzi demonstrates that Z-transform can be used for encryption and obtain promising results, which is the comparison with AES-16, AES-24, AES-32 and CEASAR.
So, since my professional goal and ideal is to allow personal and corporate data to be exchanged on the blockchain, I wanted to implement this algorithm on Starknet.
Of course, this is only a small step following the constraints that I list below but a beginning of research in this direction to explore other avenues for securing data on the blockchain.
Here are some constraints:
- The name presence of floating points on Starknet
- Saving dynamic boards on Starknet.
Nevertheless, I undertook the following solutions to carry out this simulation:
- The use of numbers without floating point: instead of taking the negative of the division, I consider its absolute value resulting in the values becoming large instead of decreasing
- The use of static inputs, here limited to 5 numbers from 0 to 10000 to perform the tests.
Implementation and testing:
The implementation is simple thanks to Protostar by:
$ protostar init ztrans
You can explore the project from my Github account in the ztrans repository.
In the structure of the project we have:
- Protostar.toml: File containing project information for protostar
- src: folder containing the source code, here main.cairo and loops.cairo
- Lib: I integrated an external library for the “pow” function
- Build: folder where the file “main_abi.json” and “main.json” are located, which are the output files of the program.
- Tests: The folder where the project’s test files are located
Project test:
To test the project, simply include the test functions in the test files located in the /test folder of the project.
You must execute the following command to test
$ protostar test ./tests
Deployment:
Account Preparation
To deploy your project on Starknet, you must be reassured to have an account on Starknet and liquidity on your account.
You can use “ArgentX” or “Braavos“, you can create an account as easily as you have Metamask on layers 1.
It is easy to top up your account on testnet using a Starknet faucet (Layer 2) or an Ethereum faucet (Layer 1) and Starkgate to transfer your funds from Layer 1 to Layer 2.
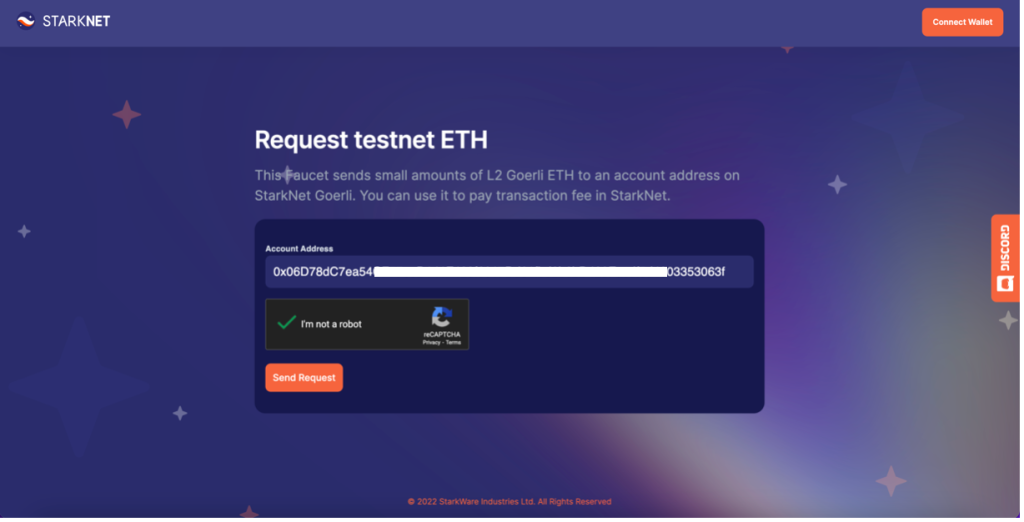
Figure 1 Starknet Faucet
Configure your private key
Since I’m using a Mac, the environment setup here applies to Macs, however, I believe you can do the same for Windows in the environment path.
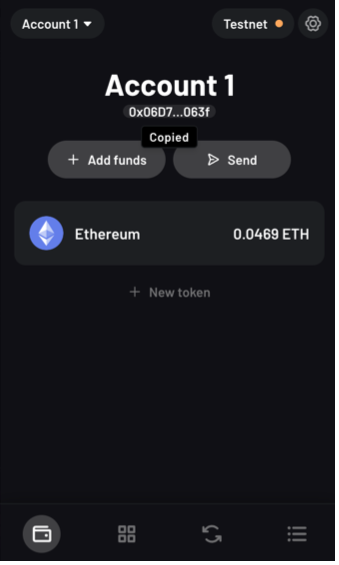
Once your account is created, click on your address to copy it, keep it somewhere.
Then go to the settings
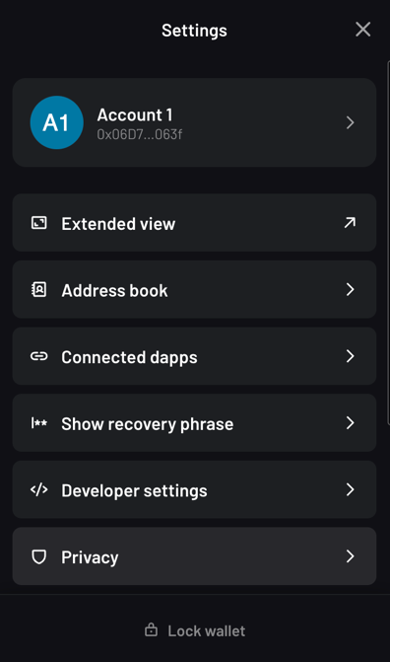
Click on “Account 1” or your account name, then “Export private key”. Enter your password, then copy the private key.
Be careful, your private key is the centerpiece of your account on the network, the person who owns it has all the rights on your account, protect it at all costs. Don’t publish it to your project’s repository on Github.
Open terminal, and then run the command
$ echo export PROTOSTAR_ACCOUNT_PRIVATE_KEY=YOU_PRIVATE_KEY >> ~/.bash_profile
With the configuration of the test environment ready, we can deploy the smart contract.
Deployment of smart contract
It is easy to deploy the smart contract, for this, you must first declare the class and then deploy the contract.
To make it easy for us, we will create three files in the project.
The first file is “declare.sh” which will contain the command to declare the contract class then “deploy.sh” to deploy the project, finally a “.env” file which will contain the environment variables of the project.
Before declaring the contract class, let’s do a build of the project
$ protostar build
To declare the project, run the following commands:
$ source ~/.bash_profile
$ sh declare.sh
To deploy the project, let’s run the commands:
$ source ~/.bash_profile
$ sh deploy.sh
File contents
.env file:
ACCOUNT_ADDR=0x06D7XXXXXXXXXXXXXXXXXXX4803353063f
CLASS_HASH=0x17562a9322837XXXXXXXXX1116e746cc4c6185236726e
Declare.sh :
source .env
protostar declare –max-fee auto –account-address $ACCOUNT_ADDR –network testnet ./build/main.json
deploy.sh :
source .env
protostar deploy $CLASS_HASH –max-fee auto –account-address $ACCOUNT_ADDR –network testnet
The smart contract being deployed, you will get the hash of the contract, the link to the Starkscan explorer and Voyager:
Contract address: 0x05b60fc1222b9a4255397e9b9672535bc3aa23550bdf6d22872e3d770d8d48c9
StarkScan https://testnet.starkscan.co/contract/0x05b60fc1222b9a4255397e9b9672535bc3aa23550bdf6d22872e3d770d8d48c9
Voyager https://goerli.voyager.online/contract/0x05b60fc1222b9a4255397e9b9672535bc3aa23550bdf6d22872e3d770d8d48c9
Transaction hash: 0x06ba05536c6ce627208f9a4721ea384c005435f576a20721fa34a818ca64c676
StarkScan https://testnet.starkscan.co/tx/0x06ba05536c6ce627208f9a4721ea384c005435f576a20721fa34a818ca64c676
Voyager https://goerli.voyager.online/tx/0x06ba05536c6ce627208f9a4721ea384c005435f576a20721fa34a818ca64c676
Interfacing the project with ReactJS
To allow ease of interaction with the project, Icreated an interface with ReactJS and StarknetJS.
The project is in the Stark-Z repository of Github.
I will explain how to connect ReactJS to Starknet in another article. Please tell me in comment what you would like to see in this article.